More ways to decorate Easter eggs
Jazz up your Easter eggs this year with both natural and store-bought dye and items you have around the house.
Updated March 6, 2013


Tools and supplies:
• 2 or 3 medium-sized coffee mugs (or pots)
• Slotted spoon
• Hard-boiled eggs (as many as you need)
• Clear glue stick
• Store-bought dye kitNaturally-dyed Easter egg (colour: brown):
• White table vinegar
• Coffee grinds (colour: brown)
• Canned blueberries (colour: blue-grey)
Instructions:
1. In a medium pot, add one cup of water for every handful of dyestuff (for coffee and blue berries, one heaping tablespoon will suffice).
2. Boil the mixture until you like the colour obtained, but keep in mind that the eggs will be lighter than the liquid. If you want darker eggs, let the mixture boil longer.
3. When you like the colour, strain the liquid and place in a glass jar. Add 2-3 teaspoons of white table vinegar for every cup of dye.
4. Put the egg into the dye. The egg should be completely submerged. Be careful, as the jar will be hot.
5. Let sit for as long as necessary to obtain the desired colour. Note: You may need to leave overnight to get the colour you want.
6. Remove eggs from liquid (Note: A slotted spoon works well to scoop them out). Be careful, as the colour can rub off. Gently place upright to dry (and seal the colour).
7. For store-bought dye, follow the instructions on the box.
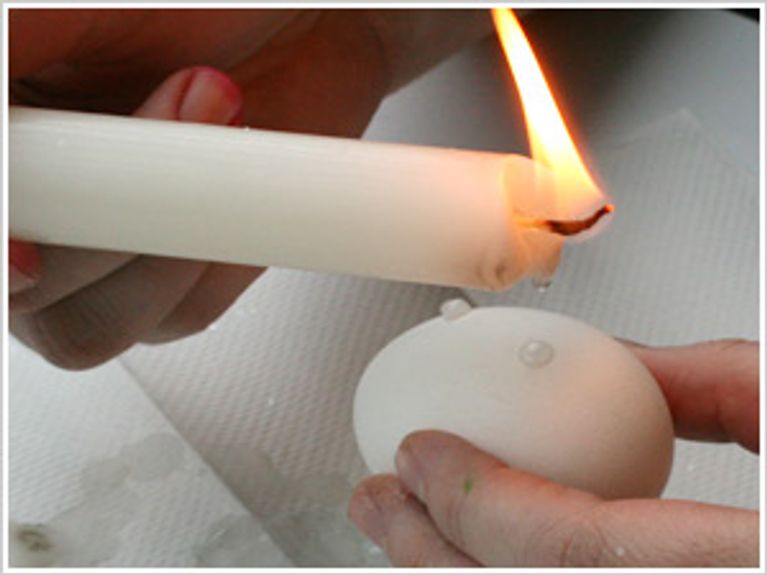
Polka dot Easter egg:
• A white tapered candle and matches/lighter (not non-drip)
Instructions:
1. Start with a non-dyed egg
2. Keeping the egg as level as possible, drip one drop of wax on the egg at a time (make sure they do not slide)
3. Let each drop harden before turning the egg to apply your next drop of wax
4. Dye the egg using store-bought dye only. The natural dye is too hot and will melt the wax
5. Once the egg is dyed, carefully scrape off the wax with the tip of a spoon
Lace-detailed Easter egg:
• Lace
Instructions (Version 1):
1. Dye the egg
2. Apply a line of glue around the egg
3. Carefully place the lace around the egg one section at a time and trim any excess lace
Instructions (Version 2):
1. Start with a non-dyed egg
2. Choose the desired piece of lace
3. Apply glue to the lace and then adhere to the egg
4. Leave the lace in place when dying the egg. The lace will be a more saturated colour than the eggSparkly Easter egg:
• Fine gauge sparkles
Instructions:
1. Dye the egg
2. Apply a layer of glue all over the egg
3. Gently roll in glitter
4. Set aside until glue has completely dried
GET CHATELAINE IN YOUR INBOX!
Subscribe to our newsletters for our very best stories, recipes, style and shopping tips, horoscopes and special offers.