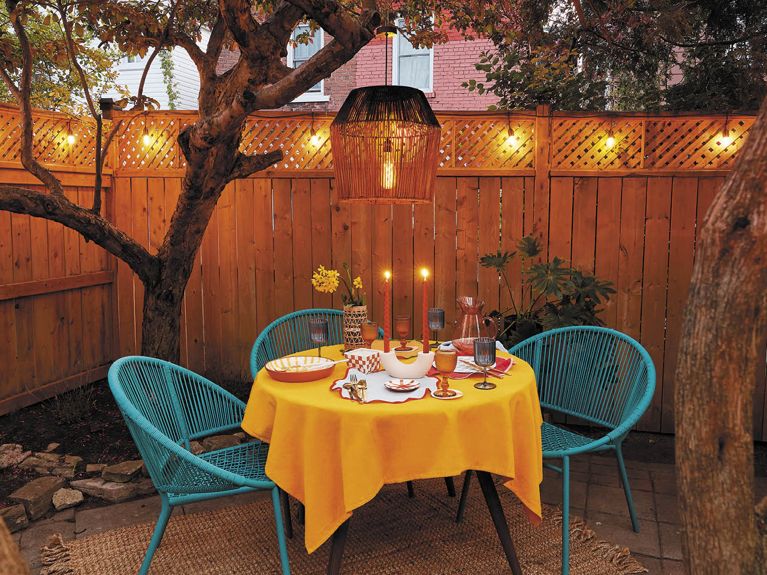
How To Make A Solar-Powered Outdoor Pendant Light

This summer, don’t let darkness put a damper on your outdoor gatherings. Whether you’re hosting alfresco dinner parties or want a cozy nook for late-night chats, a pendant light instantly makes a space feel more welcoming. “It brings in a cozy indoor-outdoor vibe,” says stylist and DIYer Jenn Park Krulik.
She had long wanted to add a stylish light fixture to her patio, but since she had no outlet to plug one into, she set her sights on something solar-powered. “Everything I saw was either really expensive or not my style,” she says. When she came across a modern wire planter at her local hardware store, she saw potential. With this speedy project, she transformed the basic vessel into a lampshade for her dream outdoor pendant light. “A pendant light makes the space feel a bit more special, warm and welcoming,” says Krulik, who now hosts frequent dinner parties on her well-lit patio. Here's how to capture some sunshine to keep the party going after dark.
@chatelaine Don’t let darkness put a damper on your outdoor gatherings. @Jenn Park Krulik shows us how to capture some sunshine to keep the party going after dark with a DIY solar-powered outdoor pendant light made from a planter. #outdoorentertaining #patiolight #patio #backyard #diypendantlight #easydiy ♬ Glitter / City Pop_No461_2 - table_1
Materials
• Solar-light kit with light bulb • Planter, basket or lampshade of your choice • Small zip ties • Twine • Wire cutters (if using a basket)
How to make a solar-powered outdoor pendant light

Step 1: Take charge
Unpack the solar-light kit and leave the panel outside to charge in the sun for 8 to 12 hours. (Don’t screw in the light bulb just yet—see step 3.)
Pro tip: Once your pendant is set up, keep the light switch set to “on.” The solar panel will collect light during the day and the light will turn on automatically when it gets dark.

Step 2: Find the spot
Feed the cord through the top of your lampshade, with the threaded light-bulb socket facing down and the solar panel at the top.
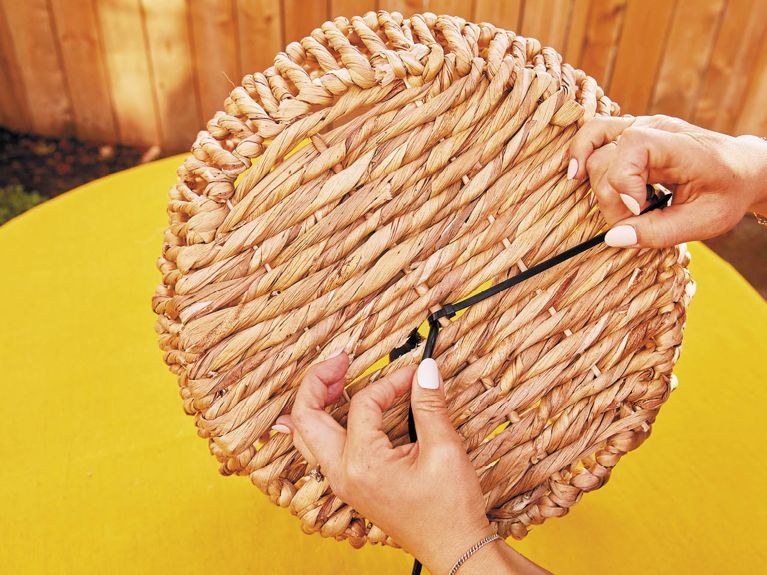
Pro tip: Once the cord is hanging at your desired height within the lampshade, zip-tie the cord to the centre and trim off any excess. (Krulik used black zip ties to match the colour of her lampshade.)

Step 3: Light it up
Screw the light bulb into the threaded socket counter-clockwise (or follow instructions to make sure components are properly connected).
Pro tip: Before screwing in the light bulb, apply a spray-on sealant to your pendant to help natural materials, like wood or wicker, stand up to the elements all summer long.

Step 4: Hang on
When it comes to hanging the pendant, find a branch in your preferred spot—it doesn’t have to be centred! Use twine if you’d like it to hang lower.
Pro tip: No tree? You can also use brackets or hooks to hang your light fixture from a structure, such as a pergola. Or opt for a solar-powered tabletop light.
How to make your own lampshade
Want to repurpose an existing item? Almost any woven basket or planter can be transformed into a stylish pendant.

Cut it out
Using scissors or wire cutters, detach the handles from the piece you want to use to create a cleaner silhouette.

Make space
Cut a hole at the bottom of the basket to pull through the threaded light-bulb socket and cord. If using a wicker basket, you may be able to part the woven material instead for a seamless look.

Tie the knot
As shown in step 2, use zip ties to secure the light kit’s cord in place once it’s hanging at the right height.
Shop the look

Light-powered solar kit with light bulb, $30, amazon.com. Wire planter, $85, lowes.ca.
This article contains affiliate links, so we may earn a small commission when you make a purchase through links on our site at no additional cost to you.
GET CHATELAINE IN YOUR INBOX!
Subscribe to our newsletters for our very best stories, recipes, style and shopping tips, horoscopes and special offers.